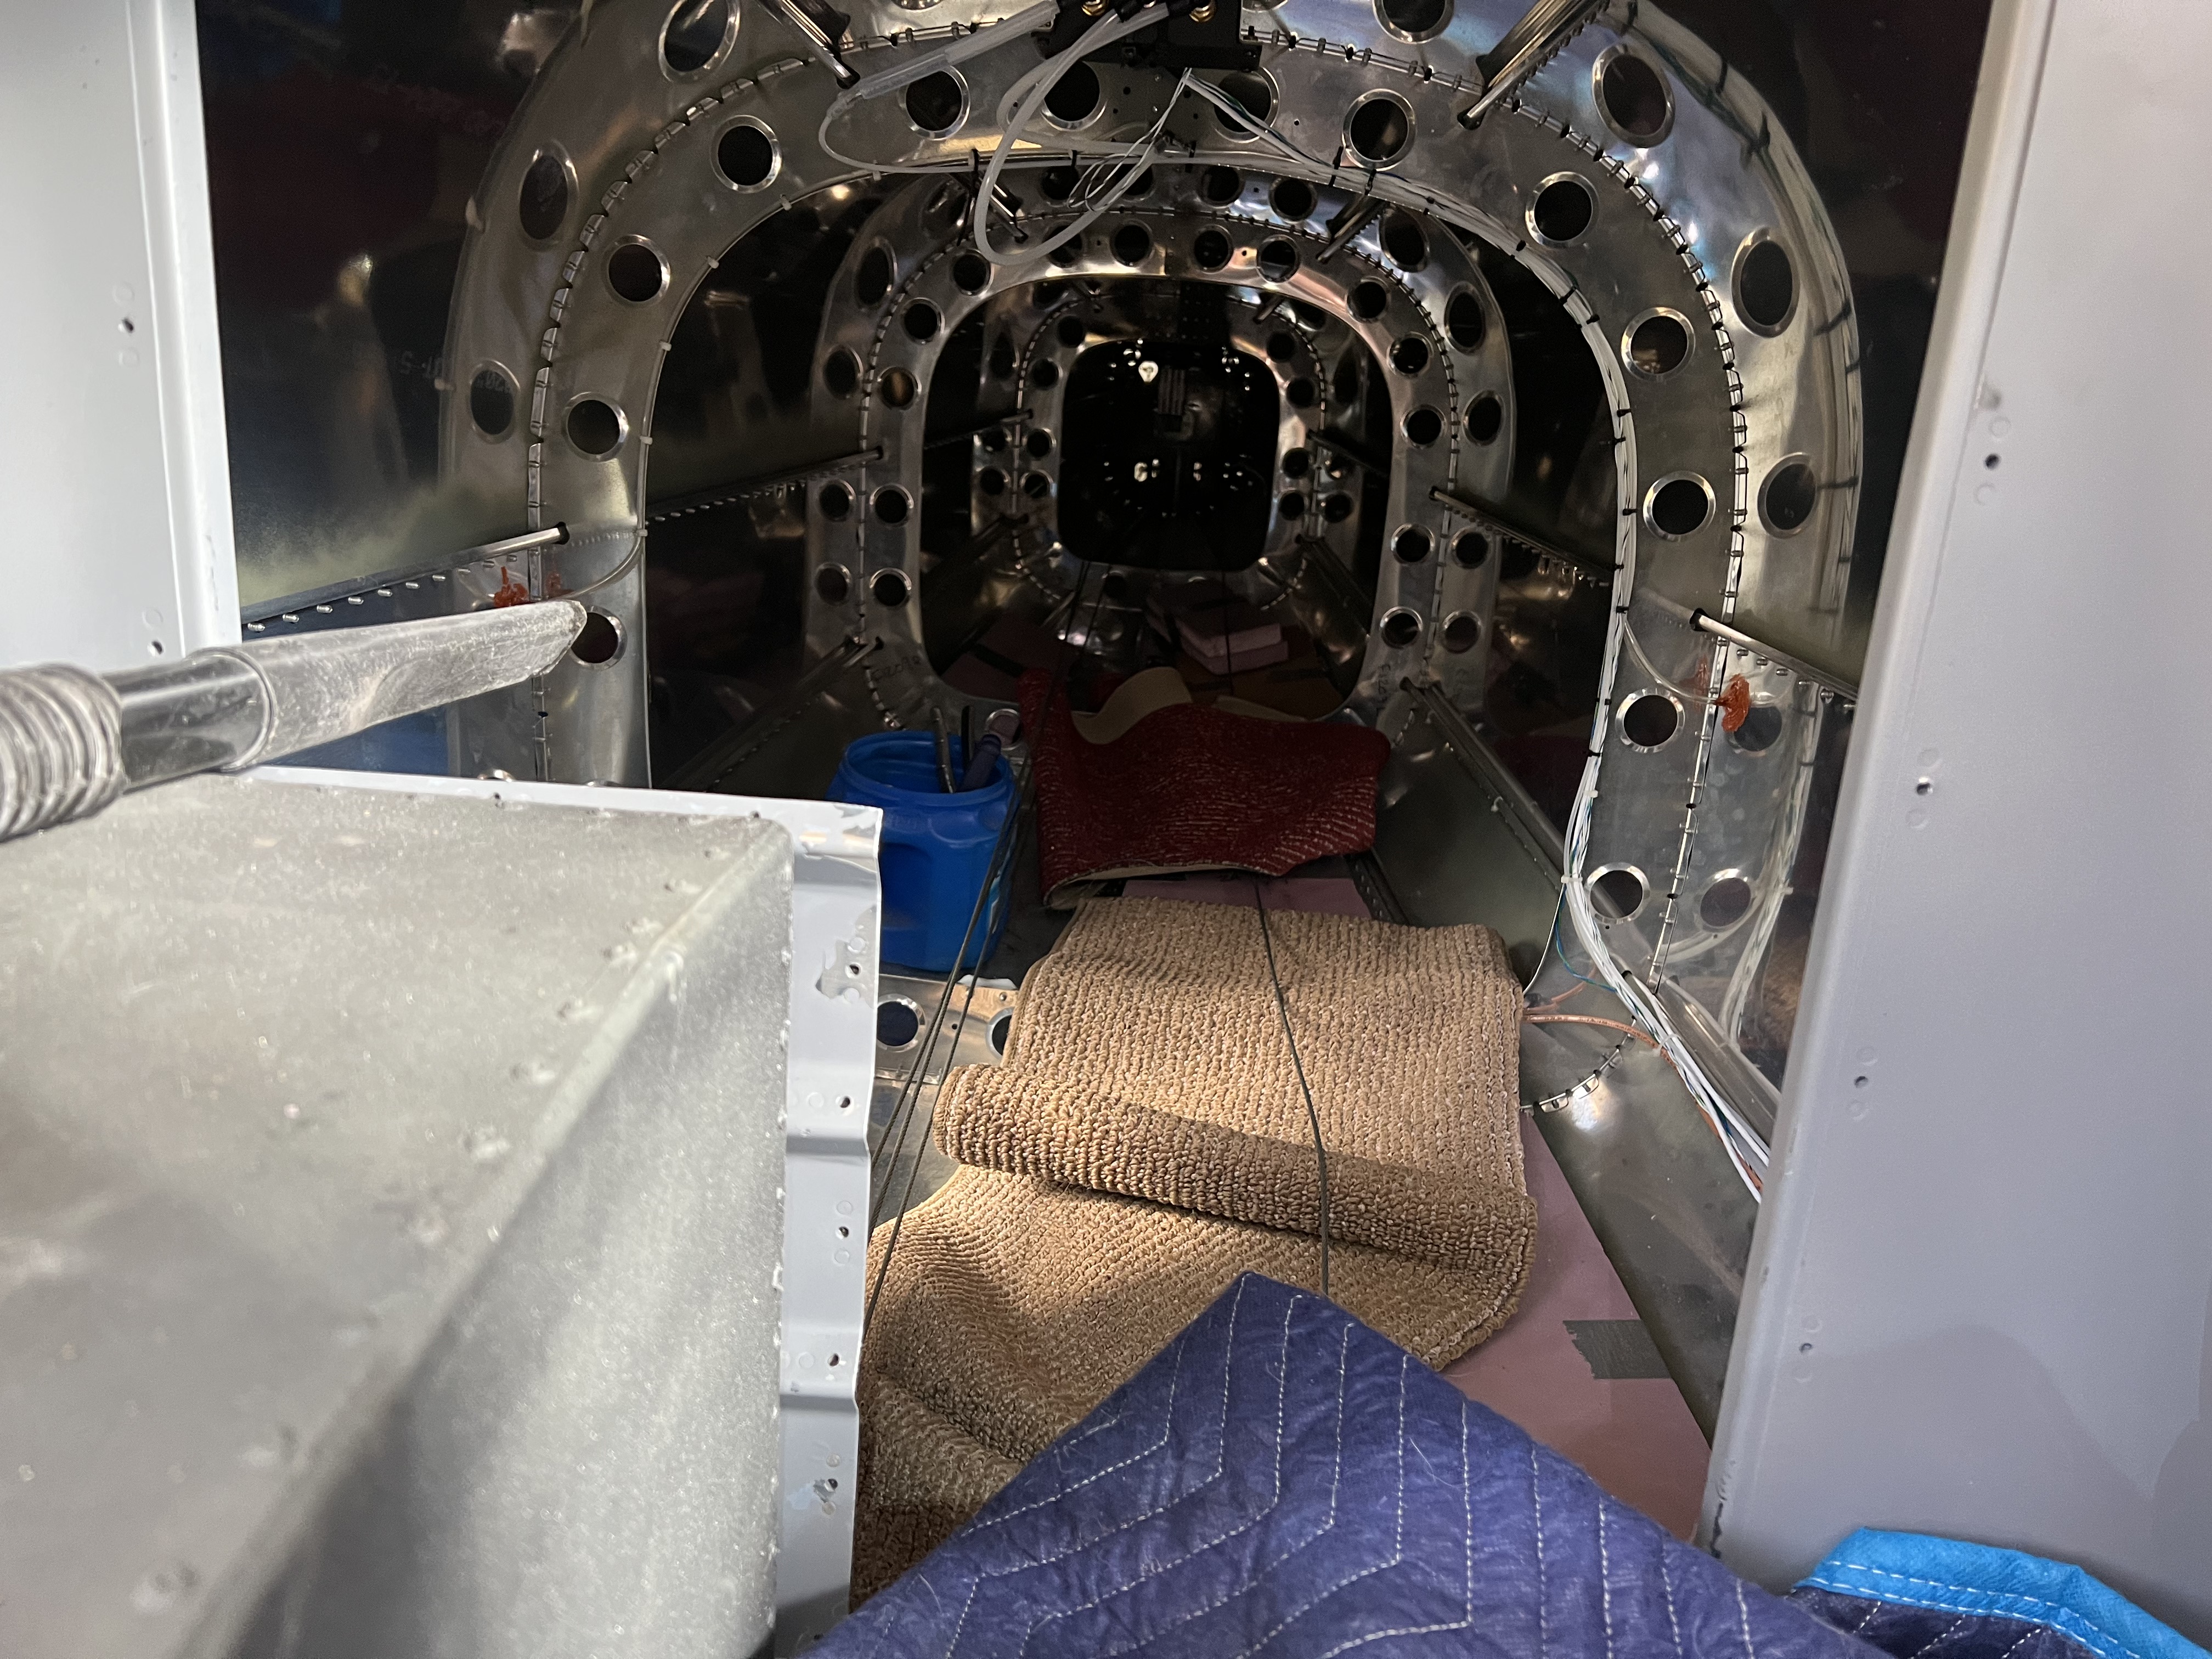
Recently, for several RV-12s, cracks in the skin of the tail cone have been discovered at the lowermost point where each of the three bulkheads attaches to the skin. A structural member with a J-shaped cross section about an inch tall runs the length of the bottom of the tail cone but is discontinuous at the bulkheads, leaving the skin itself as the load path. There are eight more of these stringers arrayed around the circumference and running the length of the tail cone, but each of them is a single piece of shaped aluminum (no discontinuity). The Mothership ran an FEA analysis and decided that stiffening brackets needed to be riveted through the front and back of each bulkhead (except the aft most, which gets only the front) and to the skin, providing a load path and relieving the skin itself of some of its burden. Sounds easy, and it would be if it were being done as the tail cone was originally built. For an airplane with the tail cone already attached (with hundreds of rivets) to the forward portion of the fuselage, it's a massive problem, far and away the most onerous Service Bulletin to come out in the entire build. A Service Bulletin for an airplane licensed in the Experimental category is roughly equivalent to an Airworthiness Directive for a store-bought airplane. The picture shows the completed installation so you can get an idea what I'm describing. If you click the pic and then expand it you can see the forward brackets installed at the bottom center of each bulkhead. The aft brackets are hidden.

First off, the six rivets joining the skin to the stringers (remember, it's discontinuous) fore and aft of the bulkheads must be drilled out. This is trivial since it can be done from outside the tail cone. Then the three rivets joining the two halves of each bulkhead must be drilled out. This, of course, must be done from inside the tail cone. The five stiffening brackets are then clecoed in place (front and back except for the aft most bulkhead which gets only the front) and riveted. This means a human being must somehow go inside the tail cone for its entire length and do all this. The pic makes the inside of the tail cone look much bigger than it is. Trust me. Van's suggested, somewhat tongue-in-cheek I suppose, that enlisting the help of a smallish teenager might be appropriate. The problem is that whoever goes back there has to have the skill to drill out the rivets without enlarging the holes and then set the new rivets. I can't imagine trusting someone else to do this, especially someone who hasn't built an aluminum airplane before.

The instructions said to cut pieces of 5/16th plywood to place in each bay to support the load without damaging the skin. I used pieces of 1-inch-thick foam insulation from the aviation aisle at Home Depot, doubled to give a stiff but soft place to put my knees and elbows. I also used moving blankets and bits of carpet (which gave me carpet burns on my elbows, reminding me of my highschool years). All this stuff and I were restricted to the left side of the tail cone because the tensioned elevator cables are on the right.
The third pic shows my work space (crawl space?) with all this stuff in place. A bit of bad luck, completely by chance, manifested itself when I realized that when I built the tail cone I put the shop heads on the rivets forward rather than aft. This meant that the rivets had to be drilled out from the aft side of the bulkheads. When I made it to the aft-most bulkhead, I discovered that my head wouldn't fit past the stabilator counterweight, meaning I couldn't see to drill out the rivets, necessitating the use of a mirror, all while painfully perched on my elbows and
knees. The gas tank on the lower left made it hard to get in and out, which had to happen several times per bulkhead. If I had had an assistant to insert clecos from outside, the whole process would have been much easier.
I hear other builders saying this seems impossible. The moral of this post is this: If an old gimp like me can do this, any builder can.
Coming soon to a browser near you: The Engine.
