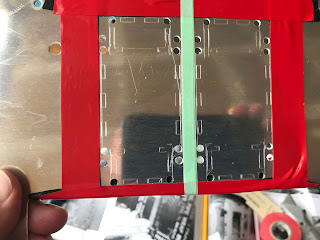
The first task required for prepping the instrument panel to actually receive instruments is to cut the holes for the two autopilot knobs panels. The autopilot can be used without the panel, of course, but the common wisdom says that using the touchscreen on the Dynon Skyview HDX for all inputs is less than ideal. It's much easier and more fun with actual knobs (especially in turbulence, I'm told).
Van's supplies a metal drill guide for locating and drilling the corners of the cutouts. The rest involves cutting between the holes and filing the edges smooth. The build manual suggests taping as shown to mark where the cuts go. After drilling the 24 corner holes and mounting holes I used a straight edge and scribe to mark where the cuts would go but I suppose the tape makes it more visible.
The Van's site shows a part number for the center panel with the cutouts already there, but a call to them revealed that they never actually made it available.
All the other cutouts and holes seen in the pic at right are already there.
I had received the right panel long ago and 1640 miles away when I was still in my ancestral stomping grounds of North Carolina. The plans then called for all the holes in that panel to be counter sunk, which I did. After making the decision to use faux carbon fiber vinyl wrap on the panel, I regretted that. Turned out it didn't matter. I have used black oxide button-head machine screws for the entire panel and, as the picture shows, they work just fine, even with counter-sunk holes. The vinyl is 3M 2080 and, in my humble opinion, looks great. I was so pleased with the wrap that I've decided to wrap the whole airplane. Seriously.
If you click the pic to enlarge it, I think you'll agree. The hardest part was getting the "weave" to line up at the panel edges, especially for the map box door. I did the center and right panel with the aluminum pieces lying flat on a table. For reasons I can't remember, I applied the wrap to the left panel after it was mounted in the airplane, resulting in a weave mismatch between the lower part of the left and center panels (visible in the next pic). If I were doing it again I could do it perfectly (once again recalling the sage advice of those who have gone before: Perfection is the enemy of actually flying your airplane.All instrument holes were cut out with an Exacto knife after the vinyl was applied, leaving about 1/2 inch extra to be wrapped around the hole edges. A diagonal cut was made at each interior corner to allow wrapping. All the screw holes were opened by spinning by hand a slightly larger bit in the hole. The button-head screws conceal imperfections.


